
Oracle 11g on Linux
Last updated on Jun 12, 2024

Oracle 11g on Linux - Table of Content
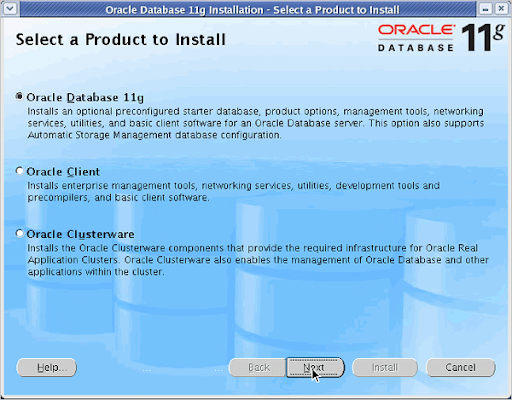
Installing Oracle Database 11g on Linux:
The Oracle Universal installer is used To install the “Oracle Database 11g software”.To begin, you'll need a DVD or downloaded DVDs to instal Oracle Database 11g. You can see the downloaded DVD version in this post.
Become a Oracle BI Certified professional by learning this HKR Oracle BI Publisher 11G Training!
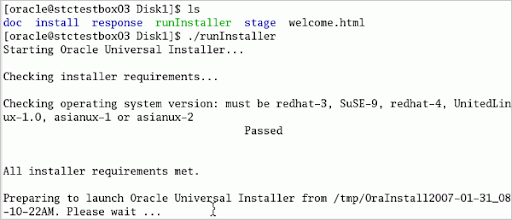
To validate the installer's specifications, run the following command. The system is now ready to launch the universal installer if the test passes.
Command:
./runInstaller.sh.
The following is the screenshot that describes the above process in detail.
To proceed, click Next.
Step 2: The selection process for installing a basic starter database is depicted in the picture below. Enter the name of the global database, the password, and the password confirmation.
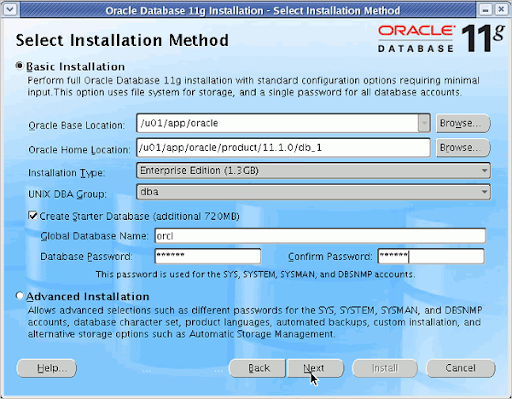
Click Next to continue.
Step 3: In this step, you must mention the inventory directory and set the location to “/u01/app/oracle/oraInventory”, as seen in the image below:
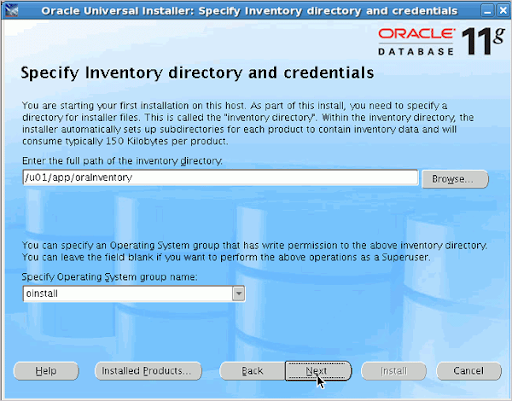
Click Next to continue.
Take your career to next level in Oracle ADF with HKR. Enroll now to get Oracle ADF Online Training!

Oracle Database Certification Training
- Master Your Craft
- Lifetime LMS & Faculty Access
- 24/7 online expert support
- Real-world & Project Based Learning
Step 4: The installer can review all of the device requirements for downloading and configuring Oracle Database 11g, as seen in the picture below.
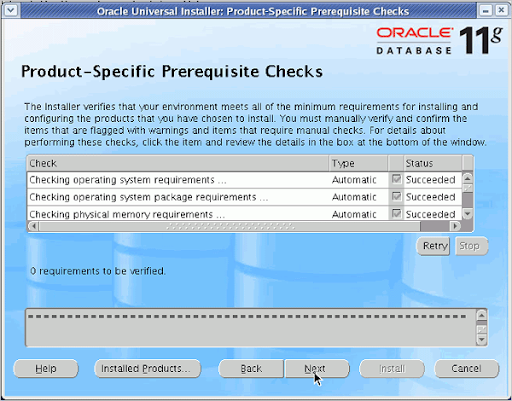
Click next to proceed.
Step 5: A registration window for Oracle Configuration Manager opens, allowing you to choose configuration details. As seen in the diagram below, you can select the option to enable:
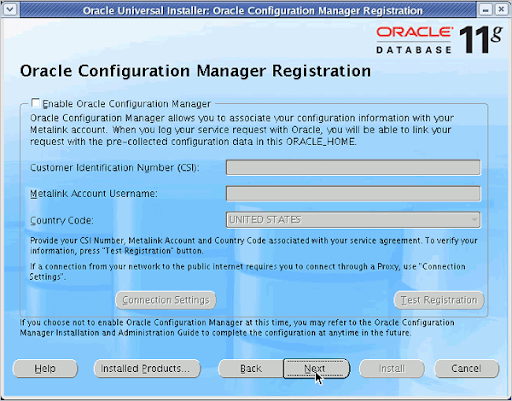
Click next to continue.
Step 6: It shows the Summary window, as seen in the figure below, to check the contents that need to be added.It shows the Summary window, as seen in the figure below, to check the contents that need to be added.
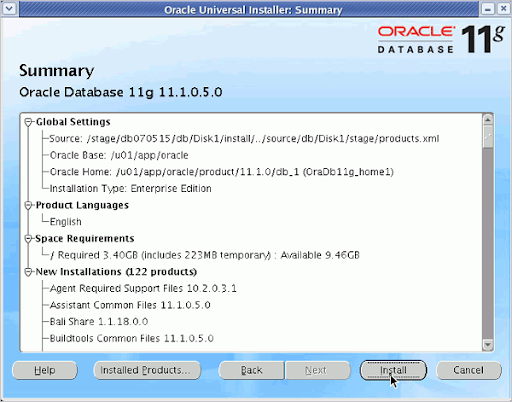
Click Install to continue.
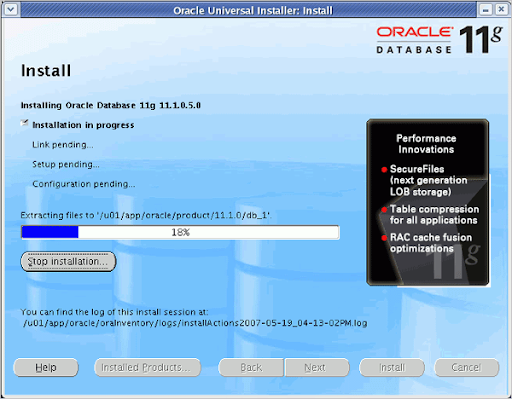
Step 7: The progress bar is visible. The progress wizard is depicted in the picture below.
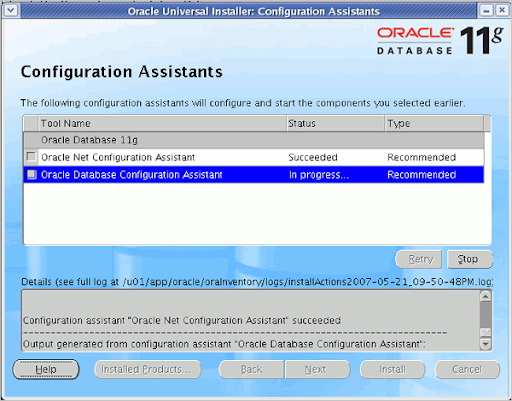
Step 8: Choose Oracle database configuration assistant when the progress bar hits 100 and the configuration assistant windows appear.
Enroll now for CISSP Online Training and propel yourself to the next level!
Acquire by enrolling in the HKR Oracle Web Logic Interview Questions!

Subscribe to our YouTube channel to get new updates..!
Step 9: The database will be built in this step.
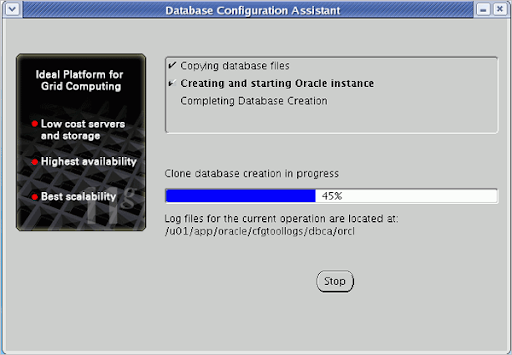
Wait till the process bar reaches 100%.
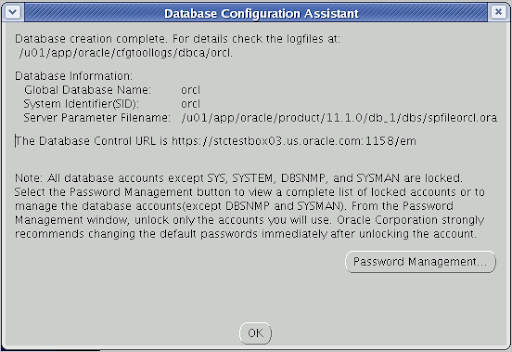
Step 10: You will access the user you choose to use after the database has been developed, as seen in the image below.
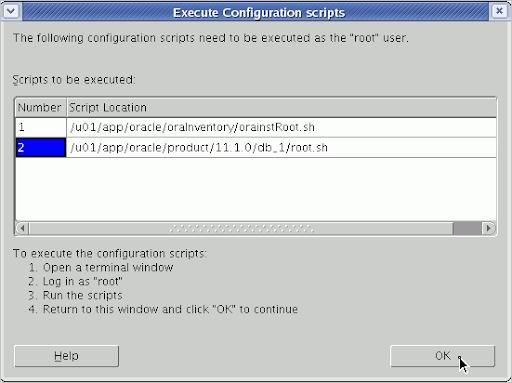
Step 11: To begin as a root user, open the execution configuration window and run “orainstRoot.sh” and “root.sh”.
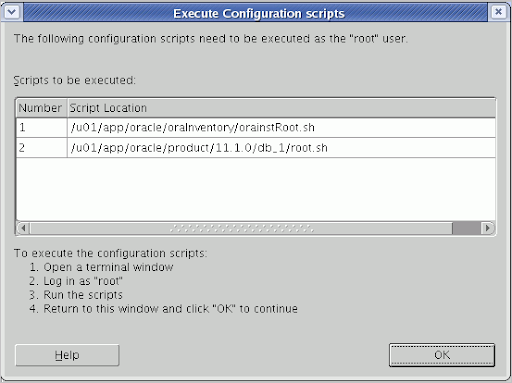
Click Ok to continue
Want to Become a Master in Puppet? Then visit HKR to Learn Puppet Training!
Step 12: In the Windows terminal, type the following code.
su -


cd /u01/app/oracle/oraInventory

./orainstRoot.sh

cd ../product/11.1.0/db_1

./root.sh

exit

exit

Step 13: Return to the installer and select OK to proceed, as shown in the diagram below:
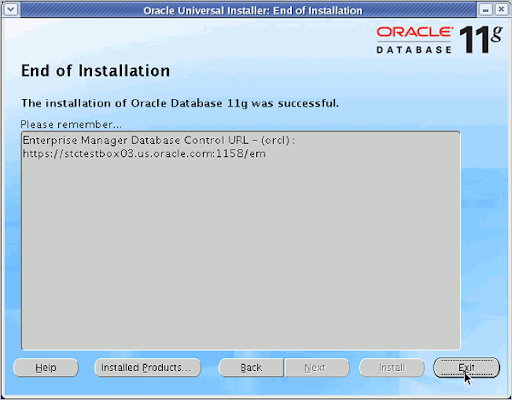
Step 14: To complete the installation, press “EXIT” as shown in the image below.
Test for installation
To see if your installation was successful, follow the steps mentioned below.
Step 1: In your web browser, type the following LUR:
https://:1158/em ( Change the hostname to the localhost or IP address of your device).
As shown in the image below, select the option "accept this certification permanently."

Click ok to continue.
Step 2: The login wizard can be found in the following location:
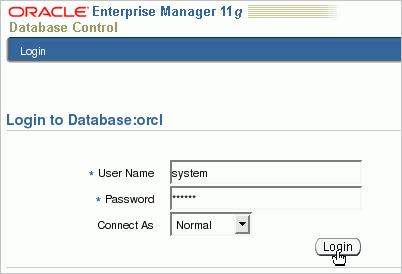
To continue, enter your login credentials and click “Login”.
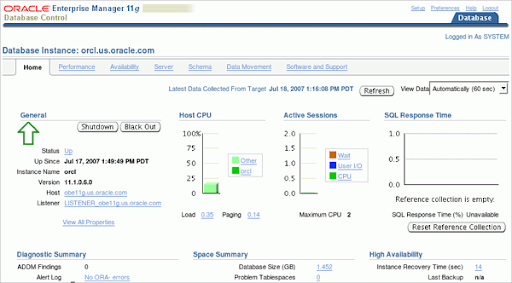
Step 3: The Database's home page appears as in the picture below:
Conclusion
We have now reached the end of this tutorial. We hope that this blog has been helpful and that you now understand how to “install Oracle Database 11g on Linux” and run a test to ensure that the database link is working properly.
About Author
Upcoming Oracle Database Certification Training Online classes
| Batch starts on 19th Jul 2026 |
|
||
| Batch starts on 23rd Jul 2026 |
|
||
| Batch starts on 27th Jul 2026 |
|