
Salesforce Record Level Security
Last updated on Nov 20, 2023


- Reviewed by
- Deeksha (Expert in Cloud Computing and Devops)
- What is Role?
- What exactly is the Sharing Rule?
- What is Manual Sharing?
- What is a Public group?
- What is Queue?
- Conclusion
What is Role?
A role defines the data access levels to a single user or a group of users. The role ensures that the senior level users have the same level of access to data as the juniors, other than OWD(Org Wide Default) settings.
How to create a Role?
Step to create Role:
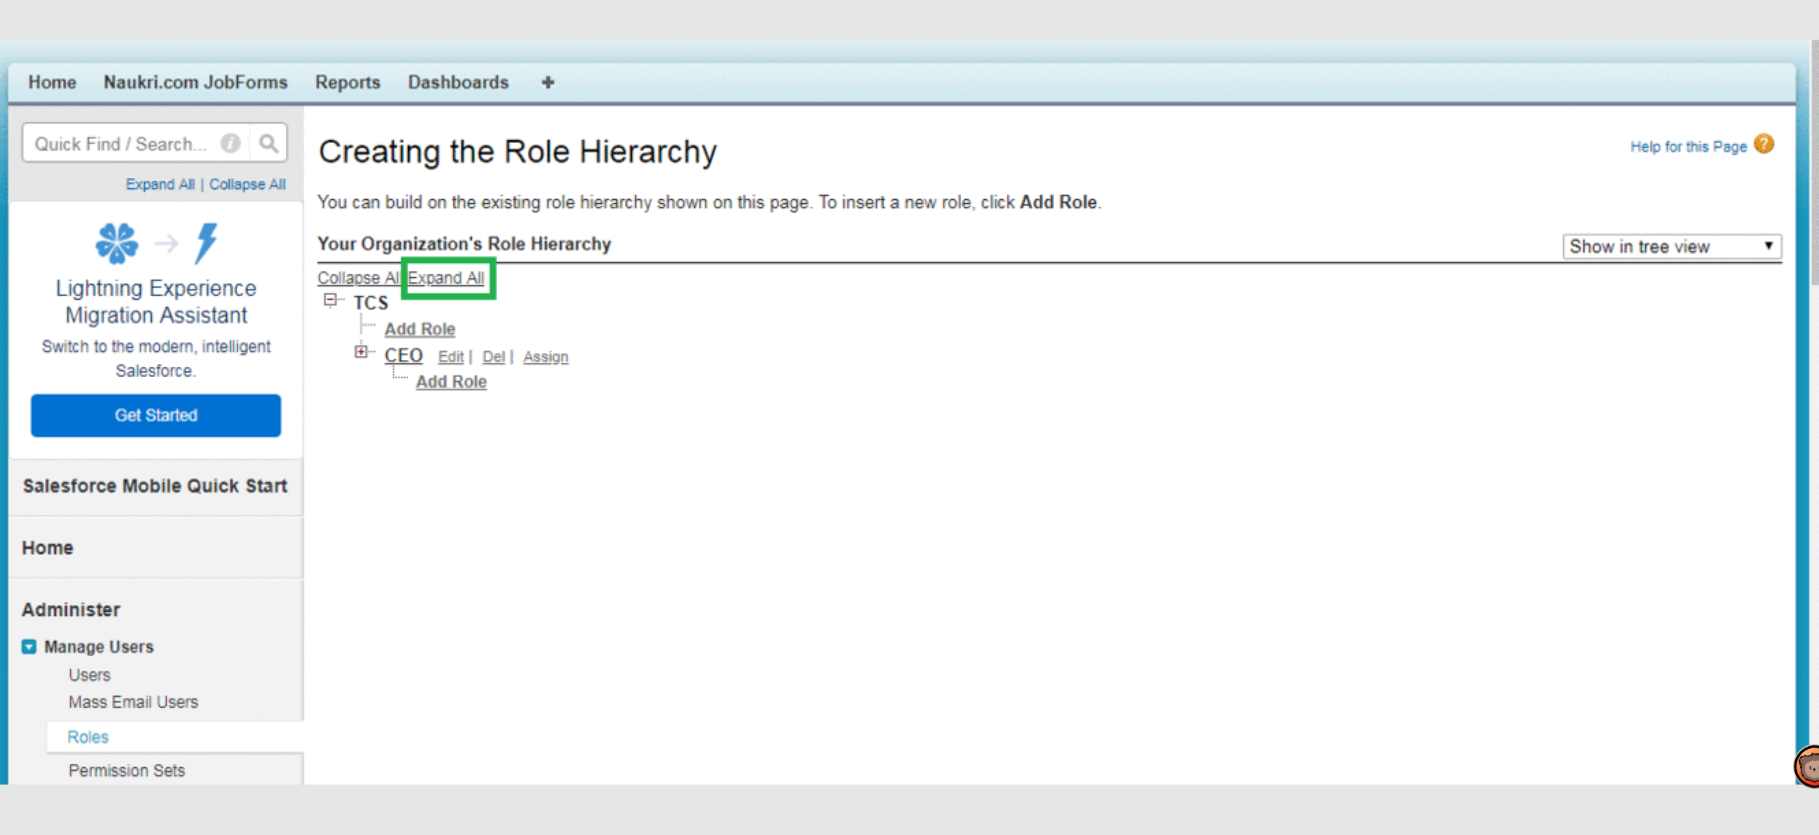
Log in to Salesforce Org → Setup → Administer→ Manage Users →Roles → Set Up Roles→COO → Assign.
Role in Salesforce
Wish to make a career in the world of salesforce? Start with HKR'S salesforce online training !

Salesforce Training
- Master Your Craft
- Lifetime LMS & Faculty Access
- 24/7 online expert support
- Real-world & Project Based Learning
The “Organisation's Role Hierarchy” tree structure is depicted in the diagram below. You can look at the "Default Hierarchy Setup by Salesforce" if you select "Expand All." Following that, we must assign the roles to the user at the appropriate level.
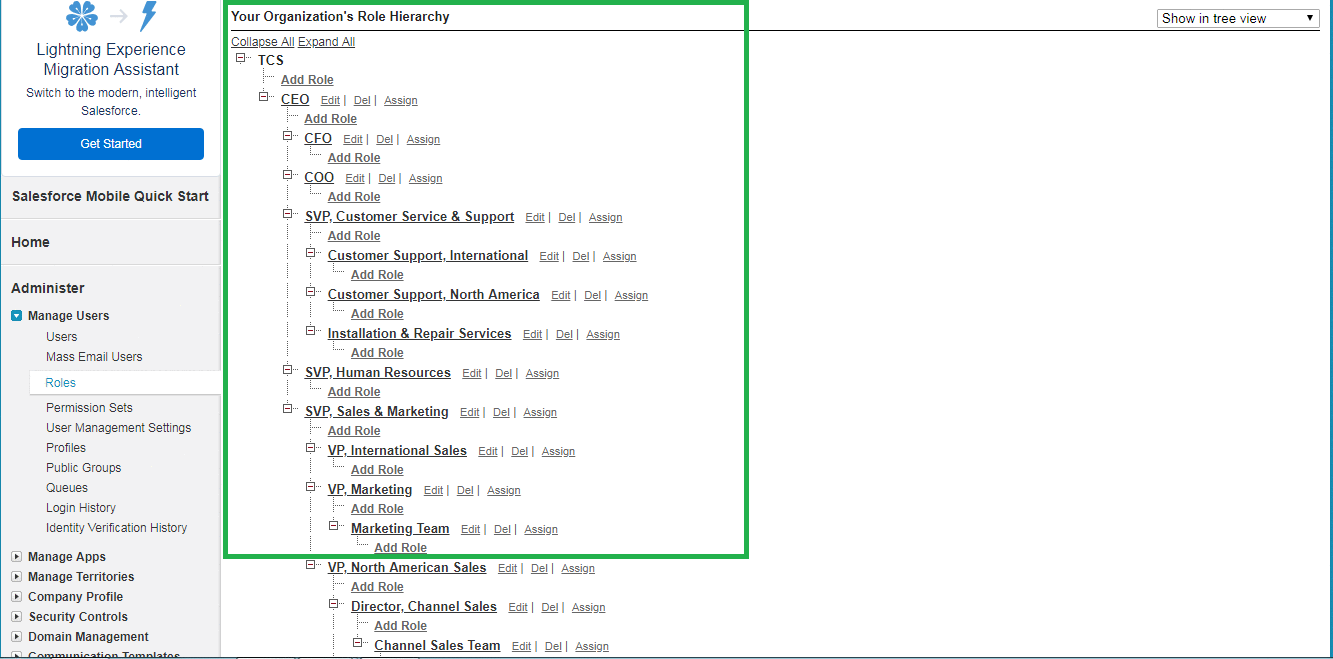
Creating a Role Hierarchy
Consider the following scenario: we have two users, one for a senior position and the other for a junior position. We will provide all of the access that a junior has to the senior-level user so that we can fully comprehend the hierarchy of access to the records.
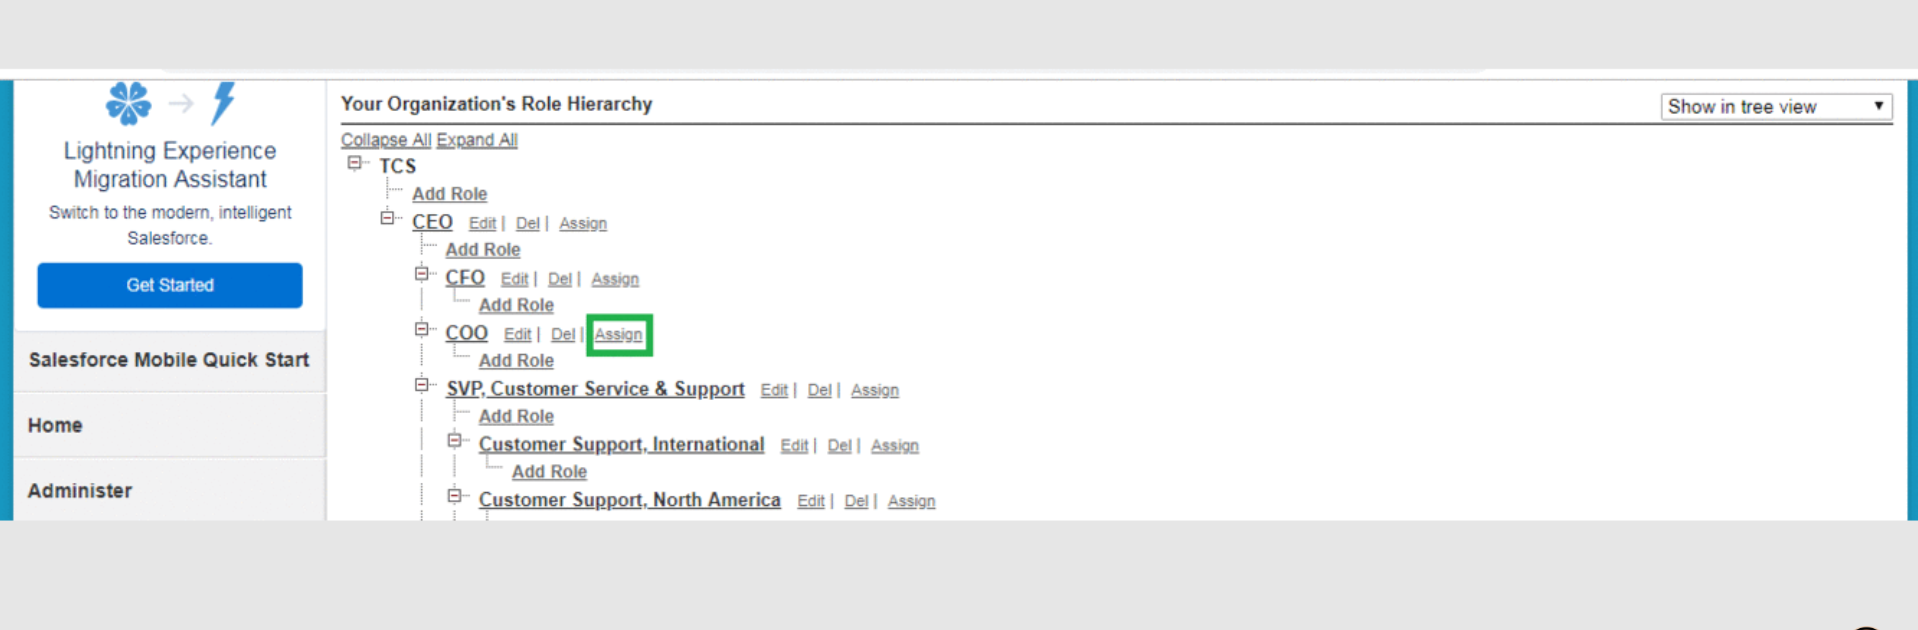
At the “COO-level,” User-1 is added. Go to the next screen by clicking “Assign” next to the COO level. You can now see all available users in the organization by clicking on "Available Users Search" and setting it to "All Users". Select the User and assign User-1, then click the Add button. The User will instantly shift to the right column. Then, as seen in the image below, save it.
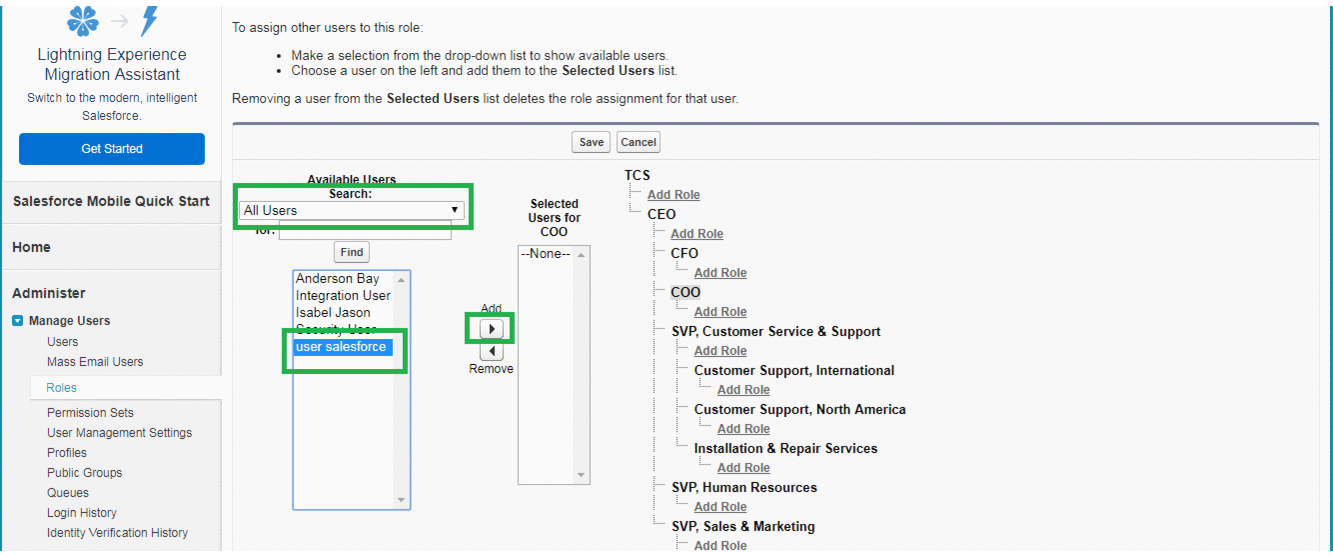
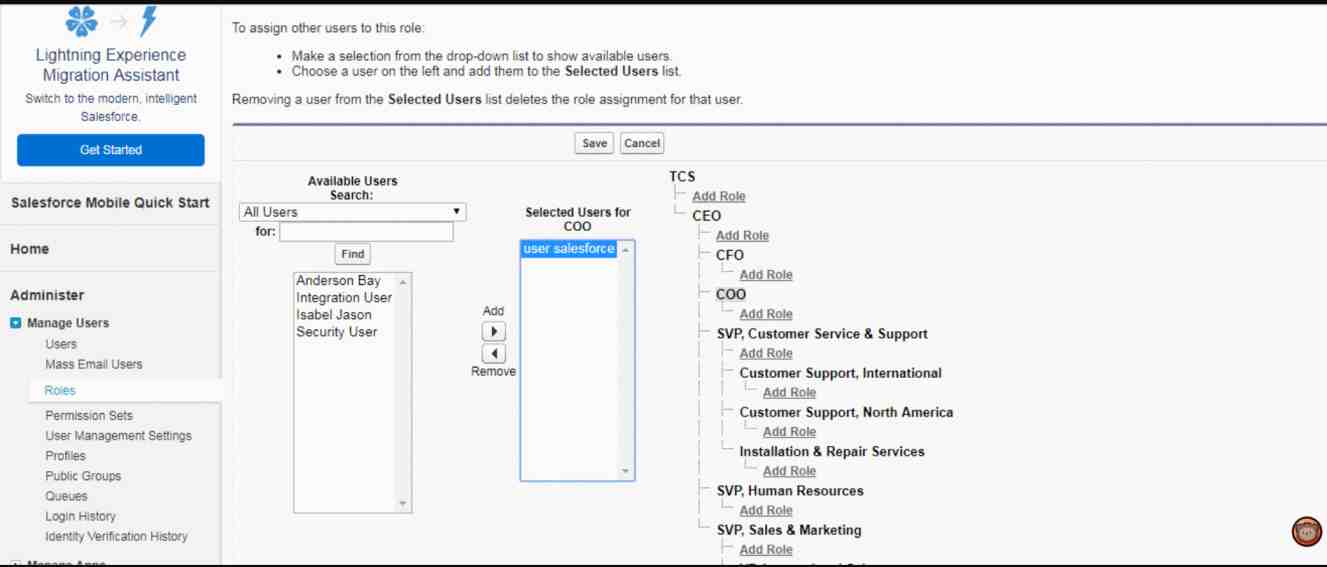
To view the user assigned to the COO level, click on it..
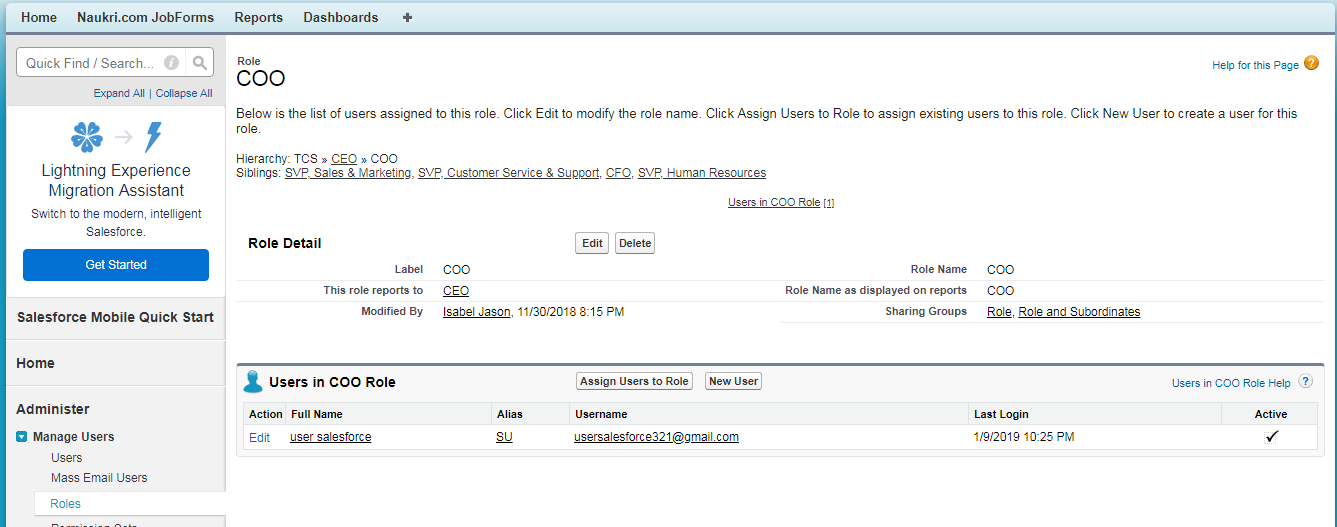
COO-level in Role
How do I create User-2 for the newly created Role?
User-2 should be created in the Role:
Log in to Salesforce Org → Setup → Administer →Manage Users→ Roles→ Set Up Roles → COO → Add Role.
Create User-2 in the Role section.
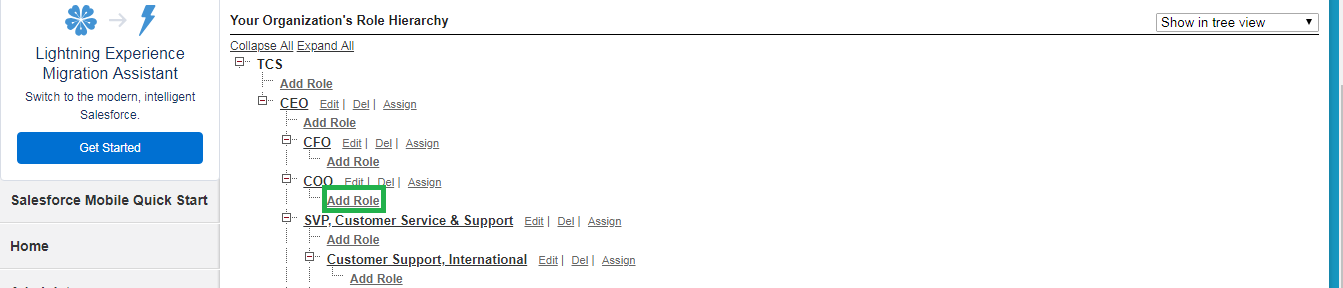
To add a junior level, click the "Add Role" button under the "COO Level". Fill in the details and click Save.
Create User-2 in the Role section.
The Role has now been created, but no one has been assigned to it. Let's add User-2. Select "Assign User to Role," then "Available Users Search," and then "All Users." You may now see all of the organization's available users. When you select a User and click the Add button, the User is automatically moved to the right column. Save it as indicated in the illustration below.
Create User-2 in the Role section.
The user is created
Now go to the user level and browse through the access levels. The user has access to all of the senior's records and has the ability to edit, create, and delete them.
In a unique situation, the senior individual will be unable to view the records of the junior employee.
Log in to Salesforce Org → Setup → Administer → Security Controls → Sharing Settings→ Manage sharing setting for - Application(eg: Naukri.com Job Form) → Organization-Wide Defaults → Edit → Application(eg: Naukri.com Job Form) → Private (checkbox) option - uncheck.
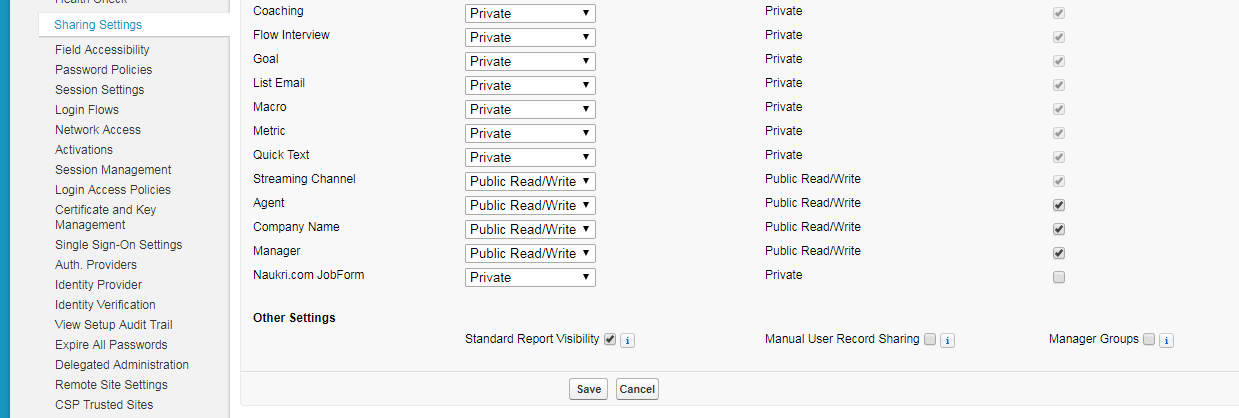
User-created in Role security
What exactly is the Sharing Rule?
Sharing rules allow you to automatically apply exceptions to Org-wide sharing policies for a group of users, giving them access to records they don't own or view. Sharing rules are used to give the user more access to the data than the OWD settings, and they are not as rigid as the OWD settings.
How to create a Sharing Rule?
Steps to create Sharing Rule:
Log in to Salesforce Org → Setup→ Administer→ Security Controls→Sharing Settings →Sharing Rules →New.
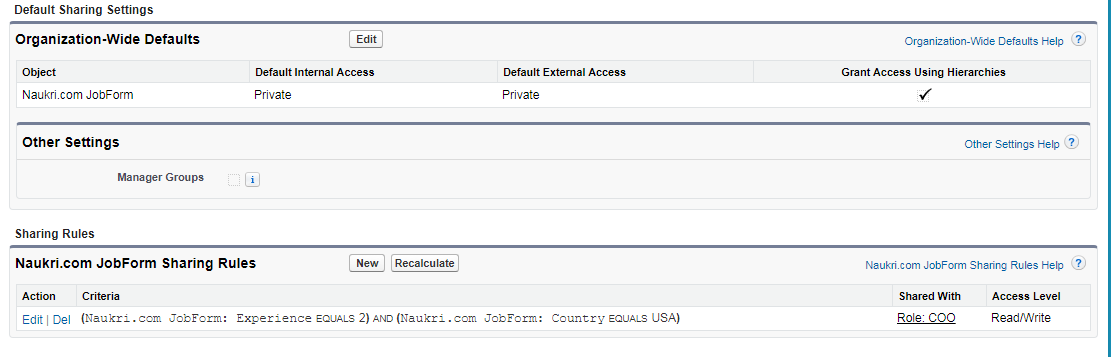
Steps to create Sharing Rule
There are five steps to complete on the screen below.

Steps for Creating Sharing Rule
Subscribe to our YouTube channel to get new updates..!
Subscribe
Types of Rules:
The following is how the sharing rule is created:
Depending on the owner of the record - (For example, the record's owner has an XYZ position that he or she shares with the ABC role holder.)
(or)
Criteria-based - (for example, We could share the records with the desired person based on the criteria).
What is Manual Sharing?
In some cases, granting access to a group of users to specific records is not possible. Only the owner of the record can manually share access with the user in this case. Other than sharing settings, sharing rules, and responsibilities, it is not automated. It only allows you to share access to records with people who don't have access to the owner of the record.
How to create a Manual Sharing?
Steps to create Manual Sharing:
Log in to Salesforce Org→ Select the required object → New Entry → After Save “Sharing Button” Enables → Add → Selects users from the list → select the necessary user → Save. The below figure determines each step in detail.
Steps to create Manual Sharing
What is a Public group?
- When we wish to share a record with a group of people so they can read and write it.
- After sharing, the owner of the records remains the same.
- It is not necessary to provide the names of the objects.
Steps to create PG:
Setup → administer → manage users → public groups → New.
Fill in the required fields on the screen and select “Grant Access Using Hierarchies” according to your needs. Select the needed (e.g., Users) and the necessary users to assign for the “Public Groups” in the search menu (e.g., Appointment PG). The steps are depicted in the diagram below.
Steps to create a Public Group
The following are the steps to using the public Group that has been created:
Setup→ administer→ security controls→ sharing settings→ select the required object >> create a new sharing rule → continue to 5 steps in the sharing rule → save.
Step-by-step instructions are shown in the illustration below:
Public Group created
Click here to get frequently asked Salesforce interview questions & answers
What is Queue?
When we want to share a record with a group of users so that they can read/write the record.
The owner is changed, and queue members will become the new, combined owner.
It is required to mention the object names.
How to create a Queue?
Steps to create Queue:
Setup → administer → manage users → queue → New.
Fill in the needed fields on the screen, then tick the box that says "Send Email To Members" if necessary.
Then, choose the required "Object" and add it.
After that, go to Queue Members and choose the necessary users from the list before saving.
The steps are depicted in the illustration below.
Steps to create Queue
How can a Queue be used?
Steps for using the Queue created:
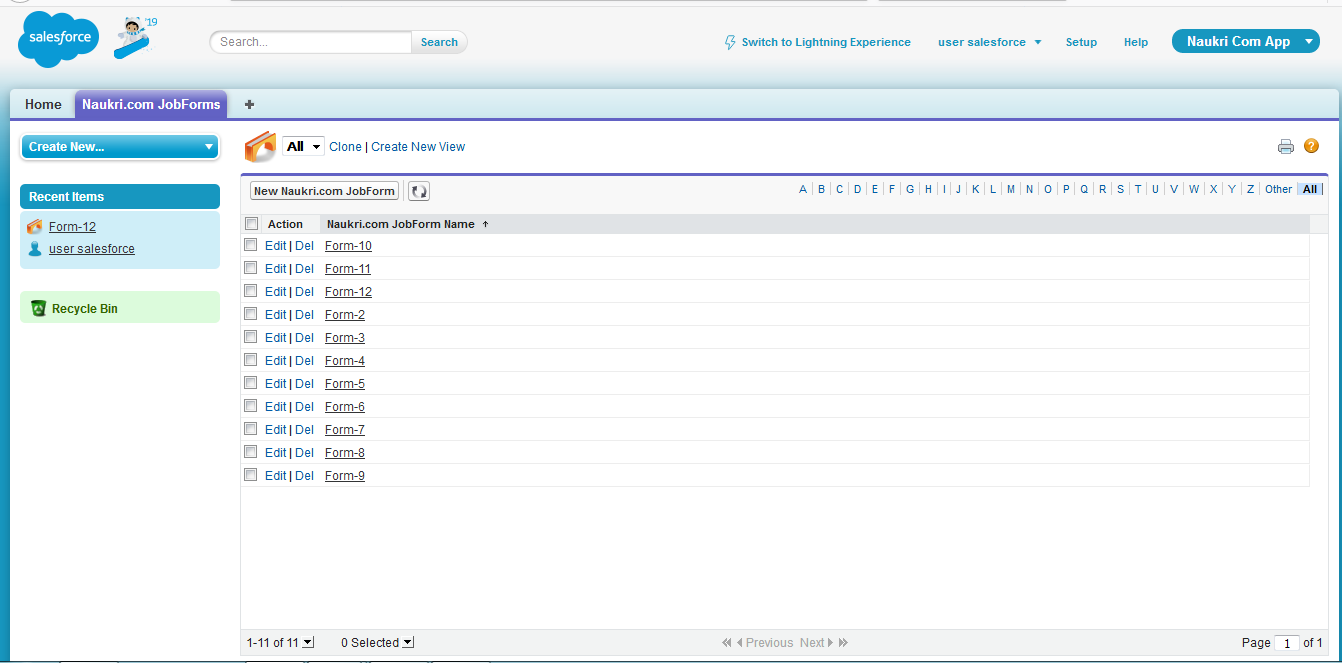
Select “Naukri.com JobForms” → Select a record from the list → select the “change,” in the owner(field) → Select owner as “Queue,” from the dropdown list, Next Click on the “Magnifying Glass” and Select the “Queue” created(e.g., Appointment Queue) and Save.
The following illustration depicts the technique in deta
Steps to use the Queue
Conclusion:
Thus by reading this blog, we have learned the concepts of record level security with implementation steps which include the role, sharing rule, manual sharing, public group, and queue.
Related Articles:
About Author
Upcoming Salesforce Training Online classes
| Batch starts on 31st Jul 2026 |
|
||
| Batch starts on 4th Aug 2026 |
|
||
| Batch starts on 8th Aug 2026 |
|